HELLO and welcome! Free Tutorials - learn how to make the projects on this blog

Scroll all the way down to bottom LEFT SIDE for list of free tutorials.


2007-09-29

Genevieve Gift Box

Here's a gift box I made for our Ohio Gathering birthday gift wrapping challenge. I used the "Genevieve" paper (my favorite paper collection!) I didn't have enough of the same ribbon so I didn't like the way it turned out. I made something completely different. I just wanted to show you how you can alter a simple gift box with TAC's wonderful patterned papers!

2007-09-25

Ohio Gathering Fun!

Had a wonderful and fun time. Met the nicest women and boy were they talented too! You'll see by the pictures. Thank you ladies for blessing my life! Here are some pictures from our Ohio Gathering. Believing to post some other things later. Enjoy!!

Frig Scrapbook Page

Here's a quick 6x6 scrapbook page to make & hang on your refrigerator. When you've completed it, insert it into an 6x6 page protector, tie a ribbon thru the two holes, add a magnet to the back of it & hang on your refrigerator. When you want to make a change, just slide a new scrapbook layout to replace this one. These make quick gifts too. I used TAC's "Pop Rockz" paper collection on the frog prince one and "Mimi" paper on the second one. I just noticed the picture was crooked on the second one - sorry!


2007-09-20

The Ohio Gathering is almost here!

These past few weeks I've been working on my r.s. demo, blog presentation, birthday gifts, display boards, digital swap etc. for Rita's NE Ohio Gathering this weekend! This is where all the Ohio (and some other states) independent demonstrators for The Angel Company meet for a weekend. We share ideas on scrapbooking, rubber stamping, business building etc. I can't wait - it's sure to be filled with lotsa fun and fellowship! I will post some of my "stuff" for you to look at later on. In the meantime here's a sample of what?:

2007-09-12

Girl, It's All About the Belly!

I borrowed my friend's camera (thanks Sheryll), since mine is getting fixed, and I'm trying to post some of the things I've been working on.

Isn't this a cute card for an expectant mom? Just love Mabelle Ramirez' stamp sets - especially this one called "It's Swell." She's awesome. Que dices, Mabelle. Te gusta esta tarjeta? I hope so. Used Catelynne paper collection.

Perky Penguin doing the ChaCha

Okay, I'm the one still doing the ChaCha - using the "ChaCha" paper collection, that is. Can you tell I like these decorative papers?! They are so versatile - you can even use them for winter papercrafting. I also used the flowers from the "Oh How" Hostess Special stamp set - they reminded me of snowflakes. So, hey, I think differently than you all, huh? Hope you enjoy this winter card.

2007-09-10

Paper Piecing with the Mimi Collection


I don't know what happened to my last post. My pictures for the "Remember September" PaperCrafting month didn't show up. So let's try it again. Here are the "Mimi" paper collection samples. I did some paper piecing on these.

For newbies, here's a quick "how to" on paper piecing:

1- stamp your full image on white cardstock and color in only the hair, face & arms.

2- stamp different parts of your image on different parts of your patterned paper. You will cut out these images and adhere them back to the white cardstock, thus, paper piecing. This is a neat way to add interest and alot of dimension to your work.


Contact me to purchase your Coordinating Paper Sets so you too can start paper piecing some scrapbook or rubber stamped artwork. Have a blessed day!!

2007-09-06

Paper Crafting Month Special!

The "Remember September" Stamping Kit is here and it is wonderful! The kit includes either the "Lilly Anna" or "Mimi" paper collection, with the following coordinating items: cardstock pack, hardware, ribbon collection AND a limited edition stamp set ALL for $24.95! When you total it all up the stamp set comes out to only $2.05. Can you believe it - where are you going to find that at the stores, huh?


Here are some samples of the "Mimi" paper collection:


2007-09-02

"ChaCha" Paper


Sorry for my absence! My camera has been out of order & I haven't been able to take photos of my artwork. Here are some "scans," though, of TAC's new "Cha Cha"paper collection. It is such a FUN paper! "ChaCha" meets "Salsa" flower stamp set and you have quite a combination going on. I keep hearing that song in my mind, you know the one they play at every vacation resort, "Some like it hot, hot, hot!" The "ChaCha" paper is wonderful - it's very versatile and the colors are very vibrant - don't know if the scans really do it justice but here's a picture SLIDE for you to view. Remember to click on slide screen for a better & larger view. Thanks for looking and God bless you much!


2007-08-04

Using DP Tags/Embellishments as Photo Frames


Here's a quick and simple 8"x8" page I made with the tags/embellishments from the "Hemingway" paper collection. Lots of times we don't use up all the tags and here's one way to put them to use. Use them as mini photo frames for a quick scrapbook layout. I used "F is for Family" hostess stamp set for the words. These were some of the tags I still had left over after I made the cards in the "Tutorial-make the use of paper stretch" post and picture slide. (If you scroll down to that post you can see how it complements this post.) So you see these punch-out tags/embellishments are very versatile - nothing goes to waste here and they go a looooong way! Sorry for the bad picture scan, but you get the idea of using tags as photo frames.

2007-08-01

Winner! - "Count Your Blessings" Giveaway

I really enjoyed reading all the blessings God has poured on your lives, ladies (You gotta scroll down to the postings to read all the wonderful blessings listed. They are awesome!) Thank you for sharing. They were very inspirational. God is good always, huh? I keep thinking of the verse that says a "faithful man shall abound with blessings." At the end of the day I ask myself "how has God blessed me today?" and it gets my mind to remembering the big and small blessings of the day. It allows me to stay thankful and to KNOW that God is my sufficiency in all things.

Well, okay, I had my assistant, the Frog Prince, draw a name to see who'll receive the chipboard Blessings Book. (That's my son's current name because of the summer play he's doing!)


...and the Blessing Book goes to Jennifer Carter! Congratulations, Jennifer! Send me a private email with your info so I can mail the chipboard Blessings Book to you. And Jennifer, what an awesome blessing you shared - I'm believing for THE BEST for you in this wonderful surprise!

Please keep coming back as I will have a monthly "Count your blessings" giveaway. It's easy - just share with us what God's done for YOU. It's just a great way to inspire and believe for one another.

God bless you all with a peaceful and productive day!

2007-07-31

Tutorial - making your paper usage stretch

For newbies asking how to make the use of your patterned paper stretch, this is for you!

We all know once we cut into a sheet of designer patterned paper, we now have "scrap paper" we don't want to waste. If you're like me, I like to use every inch of patterned paper to get my money's worth. Here's how I made this 8x8" sheet stretch in usage and therefore in value:


I was able to get 6 cards (A2 size) out of one 8"x8" sheet of "Rustic Chic" patterned paper by cutting paper into 8 different sizes. I cut the paper at 5-1/2" horizontally first. Then vertically, I cut at 3/4", 2-1/4", 2", and 3".


I could have gotten more cards out of one 8x8" sheet by cutting smaller pieces but I wanted more of the design of the paper to show.

Another way I was able to stretch my paper was to use the tags/embellishments from another paper collection and combine it with the Rustic Chic paper.

The "Hemingway" paper collection is one of our new TAC paper collections. You're gonna love it! Especially the price, $6.95 for 5 12x12" patterned paper and one full sheet of tags and embellishments! This is not the best picture since the papers are much richer in color.


Here is a slideshow of card samples where I combined "Hemingway" paper tags/embellishments with the "Rustic Chic":


I know I have a diagram of how to cut an 8x8" sheet into 10 or more different shapes so you could essentially make 10 cards! Now that's certainly a good way to make your paper stretch!! But for now, you get the idea. Cutting your paper into different angles, sizes can help you stretch out the usage of even one sheet of paper!! Try it and let me know how you did. Have a terrific day!

Here's Miss Kitty's Friend

like I said I'd show you. "Little Puppy" is one of 15 GWP (gift with purchase) free stamps you can choose from with a $30 order. I thought I'd put them together so you can see how cute they both are:


Visit me here to see TAC's stamp & paper collections. Enjoy!

2007-07-26

Giveaway! - "Count Your Blessings"

Just a reminder, on July 31st I will be picking one of you who have left a comment on this "Count Your Blessings" post. I will be giving a way the little "Blessing Book" pictured here. If you haven't done so already, scroll down to this post and tell us what has blessed you recently! Have an awesome day!


2007-07-23

"Paper Blessings": Faithbooking Class at TAC Seminar#links

"Paper Blessings": Faithbooking Class at TAC Seminar#links

2007-07-22

Tutorial - Making a Faux Belt & Buckle

Click on picture for larger image to see details of card.


Here's a quick way to make a faux belt to embellish your papercrafts:
-Cut 1/4" x 4-1/4" strip of brown paper.
-Slide buckle (Sizzix die) thru paper strip. Ink the edges of buckle first.
-With 1/16" hole punch, punch holes every 1/4" to the right of the buckle.

Voila! Instant faux belt & buckle!

Miss Kitty is ready to celebrate!! Is she not too cute? You'll have to meet her friend, Puppy. Miss Kitty is a GWP - gift with purchase. For every $30 TAC purchase you can choose one free stamp when you place your order thru me instead of online store. There are 15 GWP stamps, so you can make your own choice when you place an TAC order thru me.

2007-07-19

Treasure It


Trying out some of the new stamps. Will have more samples tomorrow. I used "Treasure It" stamp set here. A very simple card. I love the saying included in this set which reads as follows: "Be nice and smile to everyone you meet. You don't know what they are going through and they may need that smile. Treasure it." So we CAN make a difference just by smiling, girls!

2007-07-16

Monday Mom Tip

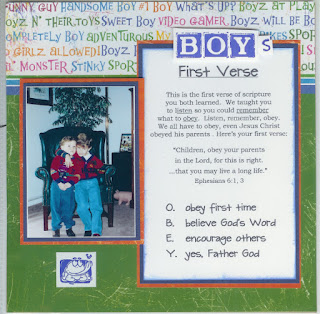
For you Blogamamas, my tip is "teaching kids 'obedience' according to God's Word." This scrapbook layout shows what we taught our boys when they were little (and now, too, of course.) They can then pass this teaching on to their children and reap the benefits of it. Of course we know their is no guarantee for obedience but as a parent I'm doing my job to teach them the truths in God's Word to follow.

This layout is very simple so it didn't take long to do. I used "Kaleidoscope Boyz" paper and "About a boy" stamp set:


2007-07-13

Tutorial - Coaster Photo Key Chain

Click on picture for larger view so you can see the "vinyl trading card sleeve" a bit better on the right side on coaster.

This was one of the swaps I made for our TAC seminar last month and was asked how I made them. It's really easy & fun! I used 4x4" chipboard coasters and did as follows:

-Ink a brayer with Kaleidacolor "Bouquet" rainbow ink and brayer the color onto the coaster - both sides.

-Pick a verse from "Scriptures" stamp set and stamp it with black ink on the left hand side. (MY FAVORITE SET - I USE IT ALL THE TIME!)

-Stamp flowers here and there from the "PetalPack" stamp set and color in with Tombow markers.

-Ink the "Speckle" stamp with Palette Landscape inkpad and stamp here and there over design.

-Ink the edges of the coaster with pink inkpad.

-Now you will SEW a "trading card vinyl sleeve" on the right side of coaster. (These are the vinyl sleeves the kids get for their Pokemon or baseball cards.) Remember only sew 3 sides leaving the top open to slide your stuff in. You will be sewing green rick rack on left side of vinyl sleeve.

-Adhere the rhinestone to the center of the big flower ON TOP OF THE vinyl sleeve.

-Punch a hole on top left corner & add a key chain, ribbons etc. For the circle picture, I punched the picture from a 2" circle punch and then layered it onto a 2-1/2" scalloped circle punch.

This can be used to hold your special photos, your business card, gas card or retemories (bible verses you're memorizing.) Makes a quick, fun and inspirational gift. Enjoy!

Friday Faves - Faithbooking

See below

You may purchase my cards and artwork

at my "Paper Blessings" ETSY Shoppe.

Copyright

All content, including text and pictures is ©Mary Leeson and is intended to be used for personal inspiration only and may not be copied for publication or contest submission. Thank you so much for visiting us!